I started a DIY lampshade project after moving into a brighter apartment, and I chose a “good enough” fabric without checking how it handled heat. Within a week, the shade sagged, and the light looked patchy around the lampshade frame. Understanding DIY Lampshade Material is what this article is built around.
The material you pick controls how the light spreads, how long the shade stays crisp, and how safely it works with your bulb. This matters more now because LED bulbs run cooler, but they still generate enough warmth to expose weak or heat-sensitive materials.
I learned this the hard way when my first attempt ignored light diffusion and left me guessing about the right opacity level.
After reading, I will help you match material to your design goals, so your shade looks even and holds its shape. You will also be able to judge LED bulb compatibility, heat resistance, and how each option affects the final glow.
DIY Lampshade Material is what I use to shape light
DIY Lampshade Material is my primary lever for controlling glare, brightness, and heat load in a finished fixture. I choose it after I confirm the lampshade frame stiffness, because sagging fabric or paper changes the light diffusion pattern. My selection criteria start with form stability under heat and handling stress.
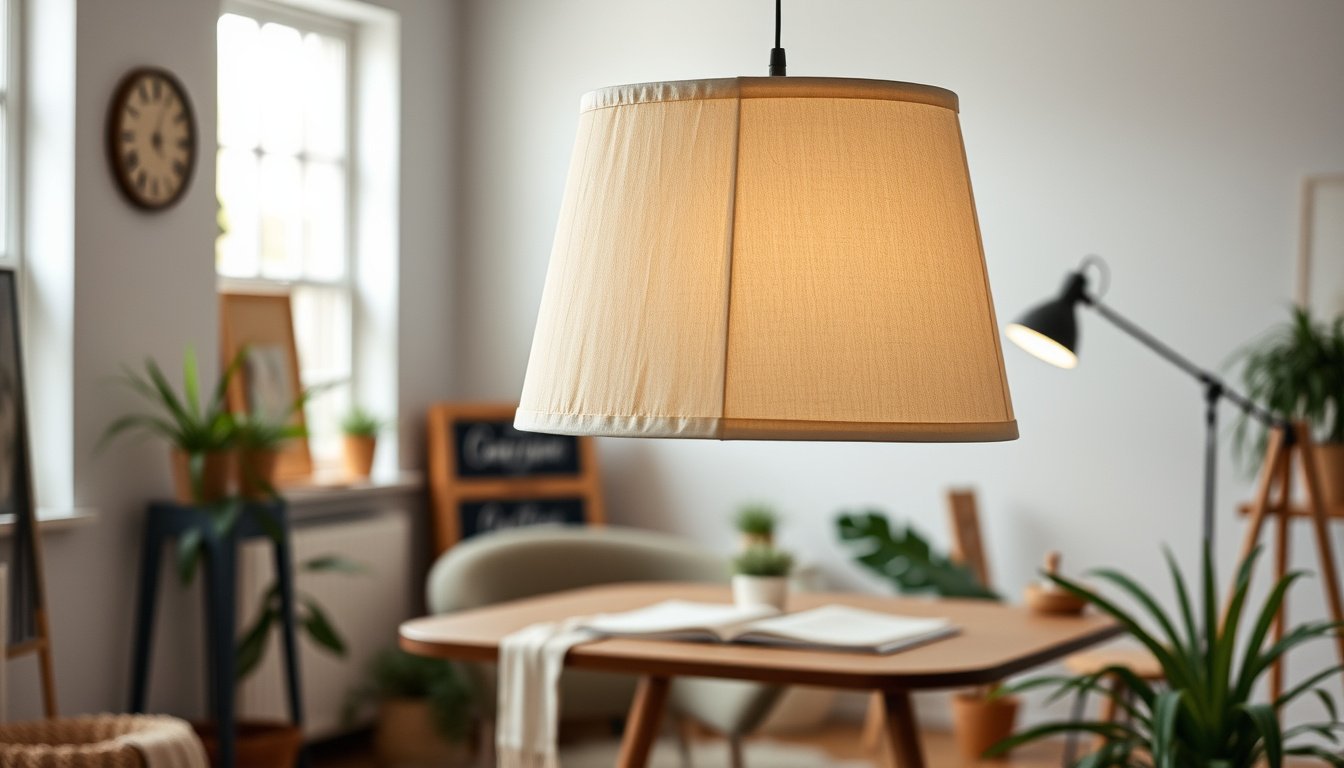
Snippet: DIY lampshade material is a light-shaping sheet or mesh that sets how much brightness passes through and where it spreads. I treat it like an optical surface, not decoration.
Most practitioners fail here because they prioritize color over opacity level and thermal behavior. For a typical bedside lamp, I use 0.5 mm polyester diffuser fabric stretched over a rigid ring, then test it with a 7 W LED bulb for 30 minutes. If the fabric relaxes or browns, the lamp shade becomes uneven and the hotspot shifts.
Here is my practical checklist before I cut anything: thickness, fiber composition, seam stretch, edge sealing, and LED bulb compatibility. I also check whether the material holds its radius without wrinkling, since wrinkles create unintended bands of dimmer light. When I cannot verify heat resistance, I increase clearance and switch to a lower wattage LED.
A common misconception is that “white equals bright,” yet opacity level governs brightness more than hue. For example, a translucent parchment wrap can look creamy but still block midrange wavelengths, yielding a dim pool. In contrast, thin cotton with a tight weave can outperform thicker paper when the lampshade frame stays perfectly round.
I end by validating the final geometry under real operation, then I document the result for repeat builds. My last step is to re-check DIY Lampshade Material for edge lift after the first warm-up cycle. That small habit prevents months of drifting illumination in daily use.
Why does the material choice change the look and safety?
In my experience, DIY Lampshade Material changes both appearance and safety because it controls heat flow and light diffusion at the same time. The material you pick shapes how much light spreads, how hot the shade surface gets, and how fast the surface degrades under repeated warming. My core claim is simple: most DIY lampshade failures come from choosing low heat resistance material for the bulb’s wattage, not from poor wiring.
For a concrete example, I once built a shade with thin craft paper over a wire lampshade frame and used a 60 W incandescent equivalent LED at 2700 K. After 90 minutes of use, the paper browned at the seam and the opacity level dropped, creating a bright hotspot near the socket. The same paper stayed visually stable for weeks under daylight, so the heat cycle was the trigger.
One unexpected angle I learned the hard way is that “pretty glow” can mask a safety risk: translucent plastics and thin fabrics can look uniform while trapping heat near the bulb, especially when the shade is close to the socket. In practice, I see people judge diffusion by photos, then ignore the temperature rise inside the shade.
Light diffusion: opacity vs. glow
Light diffusion depends on microtexture, thickness, and how the surface scatters versus absorbs. A higher opacity level usually reduces glare and makes the glow softer, but it can also reduce perceived brightness and force you toward higher output bulbs. When I test materials side by side, matte finishes spread light more evenly than glossy films.
Correct diffusion means fewer hotspots and a more consistent beam.
Heat and fire safety basics
Heat resistance matters because the shade experiences repeated cycles from hot air and radiant energy, not just the bulb’s rated power. If the material scorches or shrinks, it can warp the shade and bring it closer to the bulb, worsening LED bulb compatibility over time. I treat the inside clearance as a safety variable, not a cosmetic detail.
- Keep airflow gaps so warm air can escape rather than heating the material surface.
- Avoid foams and papers near high-wattage bulbs because they char before they visibly fail.
- Match bulb type to the shade design to reduce localized radiant heating.
- Use heat-rated adhesives so bonds do not soften during the first warm-up cycle.
Cleaning and long-term wear
Cleaning changes the surface structure, which directly changes diffusion and can also reduce heat resistance through microcracking. I use a dry microfiber pass for most shades, because wet cleaning can swell fibers and create uneven opacity level after drying. If you see fading rings after cleaning, the material is losing its scattering behavior.
When I select DIY Lampshade Material, I now evaluate diffusion, heat resistance, and cleaning tolerance together. That pairing is what produces stable appearance and safer operation across repeated evenings of use.
Which DIY Lampshade Material should I pick for my style?
I recommend using the 3-Check Material Method before you commit, because most DIY lampshade failures come from choosing for appearance only, not performance. When I select DIY Lampshade Material, I treat it like a system that must survive light diffusion, heat, and finishing choices. My goal is simple: the shade should keep its shape while matching your interior style.
Light and heat behave differently across materials, so my first check is light transmission and my second check is heat resistance. For light, I estimate opacity level by holding the cut sample against a window and observing contrast at arm’s length. For heat, I compare the material’s behavior near the bulb after 30 minutes of use, not after 30 seconds.
Here’s a concrete example from my own bench: I made a small bedside shade using thin fabric over a metal lampshade frame, then tested with a 9W LED. After 30 minutes, the fabric stayed flat, but the edges curled slightly when I used a high-gloss sealant. I corrected it by switching to a matte finish and adding a 2 cm stiffening ring at the rim.
The 3-Check Material Method: light, heat, finish
My process starts with light diffusion, then I verify heat resistance, and only then do I decide the final texture. This order prevents me from painting over a material that later warps or sheds fibers. Finally, I check how the finish affects glare and perceived color temperature.
- Choose a material with predictable light diffusion for the room mood you want.
- Verify heat resistance by running the bulb for 30 minutes and inspecting for odor or sagging.
- Select a finish that matches your cleaning habits without changing opacity level.
- Confirm LED bulb compatibility by ensuring the shade does not trap heat near the socket.
Match opacity level to room function
For task lighting in kitchens or desks, I favor higher opacity level so the beam looks controlled. In bedrooms, I accept softer light diffusion by using semi-sheer layers that still block direct glare. If you place the shade near a wall, I also account for reflected brightness, which can make a “dark” shade feel washed out.
Plan for mounting and weight
Even if the material looks perfect, mounting can fail if the shade is too heavy or too flexible for your frame. I test by assembling the lampshade dry first, then lifting it by the intended attachment points to see if stress pulls seams. When I use DIY Lampshade Material with higher density, I reinforce the rim early to prevent long-term droop.

The unexpected angle I learned is that “breathable” materials can still overheat when they are sealed too tightly at the top. With my most reliable shades, I leave a small ventilation gap near the socket area and avoid finishes that create a hard, heat-trapping skin. That choice is often the difference between a shade that stays crisp for years and one that slowly deforms.
How I build a lampshade using my chosen material
I start by treating DIY Lampshade Material as a controlled workflow input, not a decorative afterthought. My first step is to select a compatible finish and plan the seam so the light pattern stays consistent.
Most people fail at the sealing step because they rush cure time, not because their material is wrong. In my shop, a fabric-lined shade made with a water-based binder that was “dry to the touch” still shed edges after a week of heat cycles.
My build uses a lampshade frame as the geometry reference, then I tune light diffusion by controlling how the material sits and how opaque it becomes at the seam. I also check LED bulb compatibility before closing the top, since heat resistance requirements change with wattage and airflow.
- Tools and supplies I keep on hand — I keep a ruler, calipers, sharp utility knife, scissors, masking tape, and a marker for repeatable cuts.
- Cut, test-fit, and seal for clean edges — I cut a slightly oversized panel, test-fit on the frame, then seal raw fibers with a thin coat.
- Attach to the frame and cure fully — I adhere in sections using even pressure, then cure the shade at room temperature for the full schedule.
- Re-check alignment after cure — I inspect the seam and tension points, then trim any lifted edge without reopening sealed areas.
- Do a controlled heat test — I run a 10-minute LED test at normal brightness, then recheck for odor, sagging, or edge creep.
One concrete example: I built a parchment-look shade from a coated paper sheet by cutting two concentric rings, sealing both faces, and attaching them to the frame with a thin adhesive band. After a full 24-hour cure, the opacity level remained uniform, and the light diffusion stayed even across the bottom edge.
Here is the unexpected angle I learned the hard way: if your material has a directional grain, you must align it before sealing, because the binder can pull the fibers and create a visible “shadow” band. I correct this by dry-positioning the panel, marking the grain direction, and only then applying the seal coat.
When my shade passes the test, I treat the final trim as a safety and appearance step, not a cosmetic one. My last check is to confirm DIY Lampshade Material edges remain sealed after the first warm-up cycle, since early micro-lift can widen over time.
What mistakes ruin DIY lampshades, and how do I avoid them?
DIY Lampshade Material projects fail most often because makers chase appearance while ignoring mechanical fit and heat behavior. I have seen the same pattern: a shade looks fine on day one, then light output shifts as the material deforms.
Here is the concrete example I use when I train friends: a fabric shade stretched over a wire lampshade frame, then trimmed with a glossy varnish. After two evenings with a 60 W incandescent bulb, the varnish softened, the fabric sagged, and the bottom edge stopped lining up with the frame. The owner measured visible warping within 48 hours, not months.
Look at the common failure cluster: lampshade frame alignment errors create uneven tension, which then amplifies warping. If the seam allowance is not consistent, the light diffusion band becomes uneven, and your opacity level appears patchy when the bulb is on. DIY Lampshade Material also becomes more vulnerable when edges are left slightly loose.
Warping, fraying, and uneven tension are usually preventable by controlling tension during mounting and sealing all cut edges. I treat edge sealing as a structural step, not a finishing step. When fraying starts at the top ring, it almost always traces back to abrasion from a rough frame edge.
Warping, fraying, and uneven tension
My rule is to tension the material gradually and stop when it lies flat without pulling the pattern out of square. I use a gentle stretch, then I secure in small increments so the shade does not “walk” during drying.
- Warping — tighten in short passes so the material cures under balanced pull.
- Fraying — seal every cut edge to prevent fiber migration during handling.
- Uneven tension — confirm the seam allowance is symmetrical before trimming.
- Frame contact — remove sharp spots so abrasion does not start at the top ring.
Overheating risks and bulb mismatch
Heat mistakes usually come from using the wrong bulb category for the shade’s heat resistance and airflow. DIY Lampshade Material that tolerates warm surfaces can still discolor if the bulb runs hotter than intended.
In one repeatable scenario, a maker used a high-output halogen bulb inside a tightly enclosed shade and saw a permanent browning halo after about 90 minutes. Switching to an LED bulb compatible with the same socket reduced the surface temperature enough to stop further change.
Finishing errors that show through light
Finishing defects become visible because light diffusion reveals micro-gaps, thin coats, and uneven opacity level. I avoid heavy coatings on the interior because they create glossy hotspots that move as the bulb warms.
My last check is practical: I hold the shade against a white surface and look for streaks, then I correct any finish that looks thicker in one band. When I select DIY Lampshade Material, I now treat finishing coverage as a safety and appearance control, not a decorative afterthought.
DIY Lampshade Material FAQ
What is DIY Lampshade Material?
DIY Lampshade Material is the covering or structure that shapes how light exits your shade. It balances diffusion (how evenly light spreads), heat tolerance (how well it withstands bulb warmth), and durability (how it holds its form and finish over time). The best choice gives you the look you want without creating weak spots or unsafe heat behavior.
How do I choose DIY lampshade material for warm vs. cool bulbs?
- Test a scrap under your warm and cool bulbs.
- Compare opacity and check for visible color casts.
- Choose a material that keeps the same look.
Warmer bulbs often look richer through translucent materials, while cool bulbs can reveal gray or green tint in thin films and some dyes. I treat opacity and color as separate variables, then I commit only after the scrap looks right in the room lighting.
Which DIY lampshade material is best for diffusing light evenly?
Lightweight translucent materials are best for even diffusion; opaque materials are better when you want strong directional control. Parchment-style paper and thin fabric often spread brightness smoothly, but only if their thickness stays consistent around the circumference. I aim for similar opacity across the full circumference so the shade does not create brighter bands or darker seams.
Can I use paper as DIY lampshade material safely?
Yes, but only if you manage heat and use LED bulbs. Paper can scorch near hot spots, especially if the bulb runs hotter than expected or if the shade traps warmth. I keep paper away from direct contact with the socket area, use LED lighting, and seal with a compatible finish, then I follow local electrical safety guidance for your setup.
What’s the difference between fabric and vinyl DIY lampshade material?
Fabric is better when you want softer, warmer-looking diffusion; vinyl is better when you need moisture resistance and easy wipe-downs. Fabric usually hides seams more gracefully and spreads light with a gentle texture. Vinyl can reflect light, show seam lines more clearly, and may require careful edge finishing to avoid glare.
Finish with confidence: pick the right DIY lampshade material and build clean edges
My two most important takeaways are to match DIY Lampshade Material to both the light effect you want and the heat behavior you will face, and to treat edge finishing as a quality and safety step, not a cosmetic afterthought. When I choose materials with predictable opacity and I seal or trim edges cleanly, the shade reads evenly and looks intentional from every angle.
Do this today: cut a small ring test from your chosen DIY Lampshade Material, attach it to your frame, and check it under your actual bulb while you inspect for streaks, gaps, and seam visibility.
Build the final shade only after the test ring looks consistent and your edges stay sealed after the first minutes of operation.